How does this work ? What’s the Melocussion made of ?
This is the first part of a series of post dedicated to the technical challenges that I had to go through.
Well, first of all,
Why was the Melocussion built in the first place ?
Because I wanted to play drums while playing the melodica.
I am indeed enjoying beatboxing and beatboxing wasn’t possible by blowing into the melodica.
Then of course, I added more and more features that I haven’t imagined in the first place, like volume control, a midi keyboard, a mic, a touchpad to make sound effects…
It’s got quite out of control after a year of prototyping !
How does it works then ?
Well, the main goal of the Melocussion is to play a drum sound.
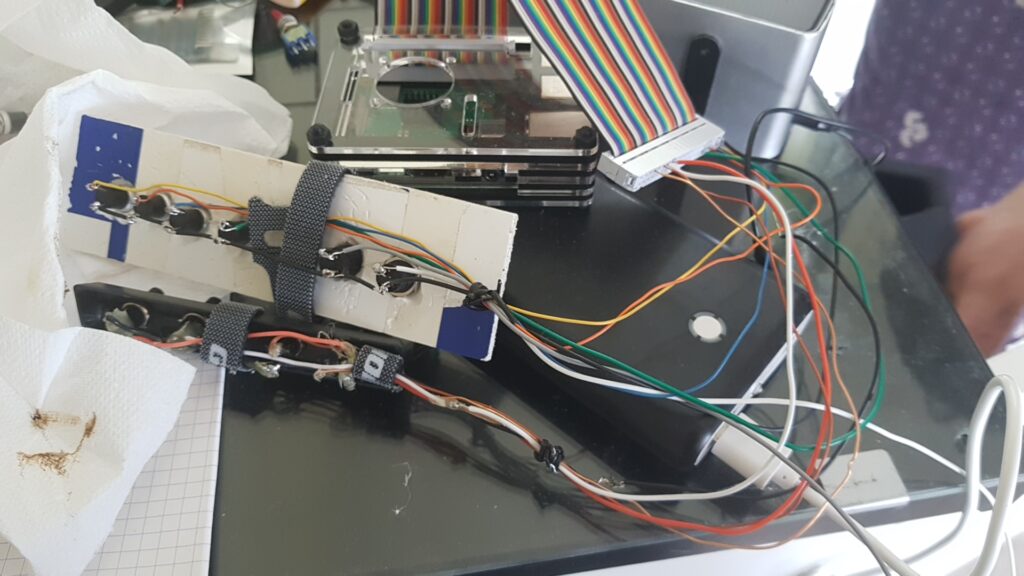
The first step is to get the input of the musician, it needs to be practical, comfortable and stylish. My first idea was using my soldering iron to weld buttons on a Raspberry pi (a very small computer)
Disaster 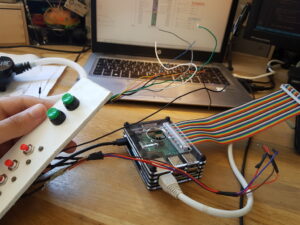
Suffering 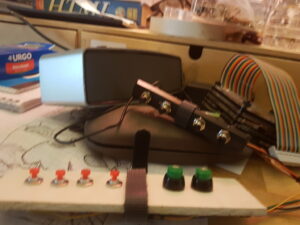
Agony
Because I’m very bad at electronics, it got really messy and hard to work with. Also, it didn’t work well, the buttons were pushing themselves without my permission !
So I have chosen a much simpler solution :
Reading the inputs of an already build keyboard

It’s way more reliable and its got way more buttons that I could have hoped for, and I can easily read the inputs !
I made a simple schematic to show how a drum sound is played when I press on a button on the NumPad :
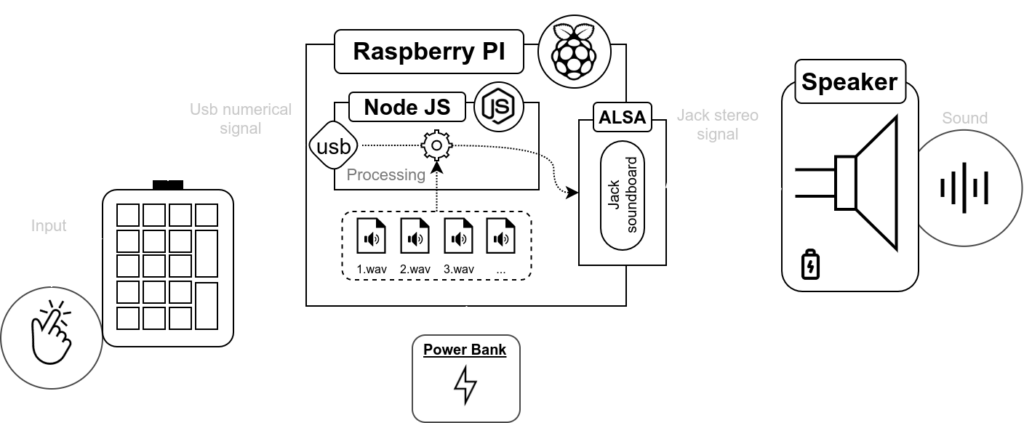
As you can see, to play a sound, I will need to power and to do a little bit of programming on the raspberry pi, to add a speaker, to find drum sound to play…
For those who are wondering why I have chosen Node JS for the programming language, the fact that we can do some asynchronous programming was really handy, I will give more details on a future post.
After a little bit of prototyping, it all worked well !
There were few technical difficulties, like being able to play more than one sound at once and with a minimum of delay, find the right power bank powerful enough to power the pi…
But the best thing of them all, is that I’m now using USB peripherals to play music, which allows me to test and debug my program directly from my computer !
But that’s not all, isn’t it ?
Well, of course not. I still need to fix all of this mess on the melodica to play my drums anywhere I go.
And guess what ? That’s the subject of my next post !
Hi Tom,
Very interesting article.
I also have a Raspberry Pi, which I use to tinker with things in the same spirit.
With mine, I’m monitoring a weather station that was not supposed to be connectable. Thanks to the Raspberry Pi, it is. And it reminds me a lot of your project, because the input is also a digital signal, and it was quite complicated to handle.
What were your difficulties?
Can we have a little video demonstration?
See you soon!
I’m glad you find the article interesting !
Even if reading a numerical USB signal is very reliable, there were few challenges in understanding what the signal mean and how to write a scalable code that can read and use it.
For example, the keyboard I have used for my project wasn’t the only one I have tried, and every one of them were sending a different kind of data. But luckily, the ‘Création d’un compilateur’ course that we had at Polytech helped me a lot on how to write clear code.
Still interesting and well explained ! I did understand more your crafting process. See ya.